MERGING SCANS
This report summarises the improvements to the “align” wizard tools for merging multiple object scans in the latest release (3.6) of 3DSOM.
WHAT ARE MULTIPLE SCANS?
Initial Position
Camera 1, Angle 0

Stripes if used
Second Position
Camera 1, Angle 0

Stripes if used
Photos should be stored in a separate folder for each scan. 3DSOM Pro can now automatically detect photos taken from different scans and adapt the work-flow to ensure they are processed correctly when using the “Make All” button.
If the camera configuration has changed between scans (or you are using different number of shooting positions) them both scans should have a complete set of calibration shots. Otherwise the first “primary” scan should have calibration shots and these will be re-used for processing the other scans.
You can take calibration, normal and stripe shots for each scan to create point cloud data for the underside of an object. If you are using “stripe” shots you will need at least two camera positions for each scan.
NOTE: When taking multiple scans, it is important that the object does not change shape. If you plan to take several scans, we recommend that moveable parts of the object are fixed. e.g. laces on a shoe should be tucked inside the shoe so that they do not move. Be careful that buckles, labels, zips etc arenot free to move when changing the object position.
WORKFLOW FOR PRE-MASKED PNG IMAGES
If the input photos are pre-masked PNG files the workflow is now:
1. LOAD ALL PHOTOS
From 3DSOM Pro use “File > New” menu item to select all the photos from the first scan (in one folder). This should be the “primary” position with the most complete set of masked photos and calibration shots. Before proceeding with the processing you should add the photos for the other scans using “Images > Add Images” menu item. Select your shots from a different folder and hit “OK”.
2. PROCESS PHOTOS
Hit the “Make All” button (or “-run” option if using command line version) and 3DSOM Pro will automatically align the two scans. 3DSOM Pro will run through the following steps:
- Reject all photos not in the “primary” scan folder and create a starting wireframe
- For each scan, 3DSOM Pro automatically attempts to align the wireframe to the masked photos. An initial rough estimate is calculated using the “Guess” function which is then optimised to get an accurate solution.
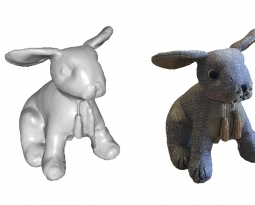
- Once the scans are aligned, the point cloud is created, the surface optimised and then texture mapped.
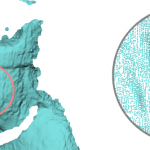
Point Cloud and textured model for merged project - model is complete including underneath
WORKFLOW WITH UNMASKED PHOTOS
If you choose to use 3DSOM Pro masking tools, the work-flow is very similar. All the photos should be loaded into the project as described above.
Hit “Make All” to start the process. In this case, the “Mask Generation” wizard is automatically launched and you will need to set a suitable threshold to create good masks for all photos. You should then go through and check the masks and use the available masking tools in 3DSOM Pro.
When masking, you should aim to have a near complete set of masks for the first scan. However, for subsequent scans you will only need around 8 to 10 good masks – so if masking is proving difficult use the “Un-mask” button (in the Auto-mask palette) or “Images > Masking > Unmask imagesI” menu item to remove masks for photos that did not auto-mask accurately.
Once you have masked the photos we recommend you save the project before proceeding.
Now hit “Make All” and 3DSOM Pro will now automatically align the scans and build a model as described above.
SEMI-AUTOMATED APPROACH
If you wish to run through each stage manually e.g. to check the processing is working correctly, this can still be done. The work-flow is essentially unchanged from that described in the User Guide.
Using this work-flow, you would manually reject the photos that are not from the primary scan and build a wireframe model using the “Generate Surface” wizard. Then, making sure where possible that at least 8 photos in the second scan are masked, select all the photos for the second scan (including calibration, normal and stripe shots) and select “Images > Align Images…” menu item. Then select “Merge Group”.
Now select the “Guess” button and 3DSOM Pro will automatically and efficiently align the model to the second scan images.
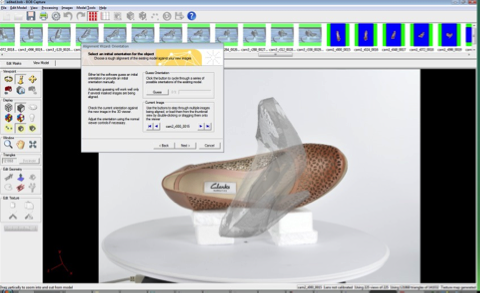
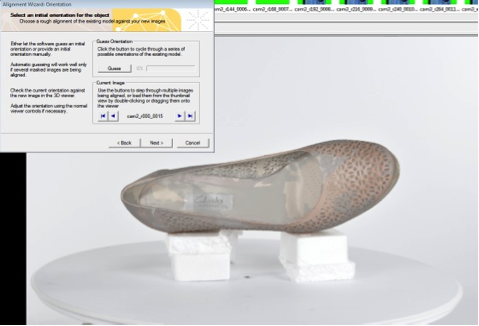
This process has been heavily optimised and improved so that the best “guess” is a fairly accurate solution and is quickly determined. If necessary you can manually rotate the model to improve the alignment should the automatic solution be incorrect. Hit the “Next” button and the “Start” button to improve the alignment (this will run much faster than before). Select “Next” and then “Finish” to accept the alignment.
You can then build a complete model by running through each step or using “Make All” to build a textured model with point cloud.
MERGING A SINGLE BOTTOM SHOT WITH STRIPES
In order to simplify the photo-taking and minimize processing time, you can take reduce the number of rotation angles for the second scan or just take underneath shots from a single turntable angle.
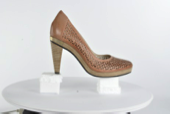
For example, in a test project we used two cameras and a projector to capture calibration, normal and stripes shots for a shoe with the shoe upright on the turntable.
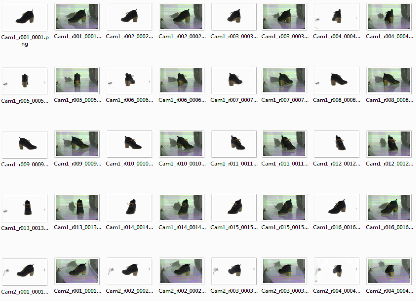
Thumbnails of normal and stripe shots for first scan of shoe
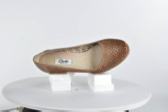
We then rotated the shoe, to see the underside of the shoe facing the cameras and used a single turntable position – capturing normal and stripe shots from both cameras for the underside.

Second scan - underneath shots for camera 2
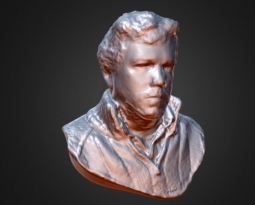
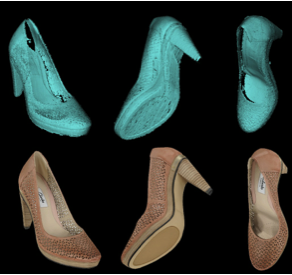
All the shots were masked and then processed in 3DSOM Pro automatically to get a complete 3D model including texture and shape for the underside of the object. Even with just two masked images in the second scan, 3DSOM Pro was able to automatically determine the alignment of the second scan and merge all the data.
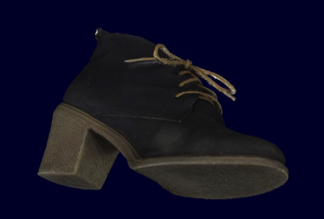
Final model with underneath texture auto-merged
CONCLUSION
Using two scans – in particular if you are using just two cameras – allows all round coverage of a model to be achieved. Previously this process was semi-automated usually requiring the user to select a rough alignment by hand which can be a difficult task requiring considerable expertise.
This function has now been improved so that for many objects two scans with pre-masked PNG images can be automatically processed with no user input required. The optimisation tool in the “Alignment” wizard has also been improved so that for complex objects it is now much faster than previously.
Please note – for very simple objects with rotational symmetry, fully automated merging of scans is not always possible (e.g. a spherical object).
Even where high up camera angles can be achieved using suitable hardware, multiple scans allows users to model the underside of objects and also to change the projected stripe illumination angle. This allows more accurate modelling of the shape of the inside, top and underside of many objects.